We all agree in unison that laziness is bound to be, don?t we? Our lifestyle has changed to an extent where making ample amount of free time for relaxation or any other activity other than being productive, is beyond imagination. We love to agree and hate to admit this. Cracked heel is a reality, poorly maintained feet is our state of life; and yet, we all manage to seek in small dreams for relaxing exclusive pedicure sessions at a spa. If time and cost make you step back, move forward with the plan by pampering your faithful hardworking sole with your own pedicure at home. A maximum of 30 minutes set aside and few basic products are great to keep you going. Let?s get started
Step 1: Prep nails for pedicure
Step 2: Cleanse
Step 3: Nail and cuticle time
Step 4: Exfoliate
Step 5: Scrub
Step 6: Moisturise
Step 7: Go fancy!
Step 1: Prep nails for pedicure
Removing your old nail color is the first and foremost step for any pedicure and manicure. Wonder why? This is because; as it is, nail polishes are not healthy for your nails and system. When the nail polish residue is left to sit on your nails, nook, and corners of the cuticle, this is going to cause extra harm. Adding layer upon layer to already existing nail polish is unhealthy and not appealing to your foot?s beauty. Use a standard acetone nail polish remover and cotton to get started. Few drops of acetone with cotton will be perfect since an excess of acetone will harm your nails. You can also use nail paint removing pads and sponges. (Click on the image to buy)

Step 2: Cleanse
Fill a tub with warm water and soak your feet for about 20 minutes. You can add either bath salt or rock salt while soaking your foot in warm water. Salt helps to remove all kinds of bacterial and microbial agents from the hard-to-reach areas in your soles and feet. This process also softens your tough dead skin and makes pedicure effective. If you are used to using pedicure kits, you can add few drops of the provided cleansing oil or cleansing lotion (that usually lathers) to the water. You can also add rose petals or pebbles for a feel good effect.

Step 3: Nail and cuticle time
Once you have soaked your feet, your nails and cuticles become soft. This is the right time to cut and file your foot nails that are usually harder than your fingernails. Use a proper nail cutter and a filer to achieve the desired shape. You should also clean the area around your nails now. Push back and scrape cuticles to make your toes look much better and healthier. Pedicure tool kits are available to make this easier for you.

Step 4: Exfoliate
Your skin is still soft. So get started with the next step of removing the tough skin from your foot. This process can be done with the help of a pumice stone. Once you?re done with removing the tough skin from the heel, use a scrubbing brush to clean the dirt and tiny dead skin particles from the ankles, heel, between the toes, etc. You might also be interested in trying the latest Scholl Diamond Crystals Velvet Smooth Express Pedi. This will give you smooth and soft heels in no time.

Step 5: Scrub
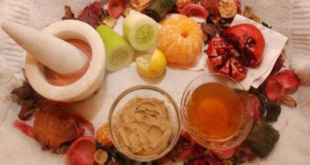
You should scrub your foot thoroughly for a good amount of 5 to 10 minutes. This will ensure blood circulates well to every part of your foot (internal action), and that your feet?s skin is free from dead and rough skin (external action). Homemade scrubs using any of your favorite ingredients is good enough to do the job. You can use gram flour with curd, oatmeal with milk, rice flour with rose water. Any and all of these scrubs are coarse in consistency and are just right to provide the topical exfoliation your feet?s skin needs.
Step 6: Moisturise
After scrubbing the tough skin off your foot, apply a generous amount of moisturizer?to prevent the skin from cracking. The moisturizer helps hydrate your skin and also softens feet after the scrubbing process. You can also simply massage your foot if you prefer doing so.

Step 7: Go fancy
Isn?t pedicure at home easy and simple? Finish off by applying an attractive nail colour. Remember to start with a base coat and let it dry for few minutes. Matte finish nail polishes need long hours for a perfect dry. Then apply the final coat.

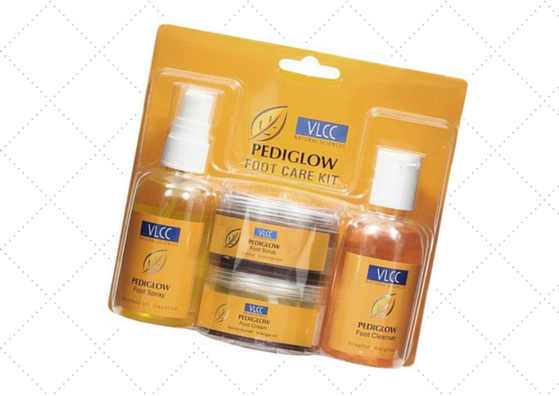
VLCC Pediglow Foot Care Kit would be the best choice to do a pedicure at home. It comes along with a cleanser, scrub, cream and a foot spray. A must for a skin friendly and cost effective pedicure. (Click on the image to buy!)
Check out this pedicure Tutorial
Here?s a?video?that might help you with the step by step process.
Cracked heels:
Cracked heels, apart from giving you the ?Oh! Hide them ASAP? trembles, they are painful! Cracked heels call for immediate attention to your feet before they worsen. Microbial agents will enter the blood stream via these cracks and will lead to bleeding, and pus cells formation under the worst scenario. You can address cracked heels right when you notice dry heels; or even if you don?t!
Home remedy for cracked heels
To be followed every night. If you do not find relief or healing, please consult a physician.
- Wash your feet with warm water and salt.
- Use a mild antiseptic soap and rinse thoroughly.
- Apply a trusted antiseptic cracked heel repair cream like Krack Cream. Spread the cream generously over affected area.
- Bandage foot using a muslin cloth.
- Wear cotton socks over this; let it stay overnight
Home Remedy for Tanned Feet
- Mix together 3 tablespoons of gram flour and 2 tablespoons of milk or curd. Scrub over feet and allow it to dry for 10 to 15 minutes. Wash off with cold water. Repeat this twice or thrice a week.
- Cut a lemon into 2 halves and spread some sugar over it.
- Rub in the sugar with lemon in firm circular movements over rough skin patches, like dark ankles, tanned areas, etc.
- Wash off after 20 minutes. You will notice significant results immediately.
- Repeat four times a week to remove tan.
Home Remedy for Dry and Rough Feet
To be followed every night.
- Wash feet using a mild soap with lukewarm water.
- On damp skin, apply your body lotion or a rich moisturizer.
- You can use-?Nivea Crem?, VLCC Liquorice Cold Cream, olive oil or til oil.
- Massage into rough and dry skin areas.
- Wear cotton socks for feet and let it stay overnight.